When we left off, this look at the ’70’s Marvel Doc Savage magazine had reached Issue #2 of its eight issue run, with the beginning of a story called “Hell-Reapers at the Heart of Paradise”.
I was 17 in 1975, and a huge Doc fan. Though disappointed with the camp approach of the Man of Bronze film, I was thrilled that Marvel — unquestionably hoping to cash in on what they hoped would be a blockbuster movie — re-launched their Doc Savage series in a new format (the first comic series, which had adapted pulp novels at a two-issue per story pace, had fizzled and been cancelled). The line of black and white Marvel magazines of the time, catering to a slightly older audience, seemed a perfect vehicle for a revitalized Doc.
The stories were all new rather than adaptations, written by Doug Moench, and drawn by a succession of artists, though in a style made cohesive by the ongoing presence of Tony DeZuniga as either pencil or ink artist. This second issue was drawn entirely by DeZuniga.
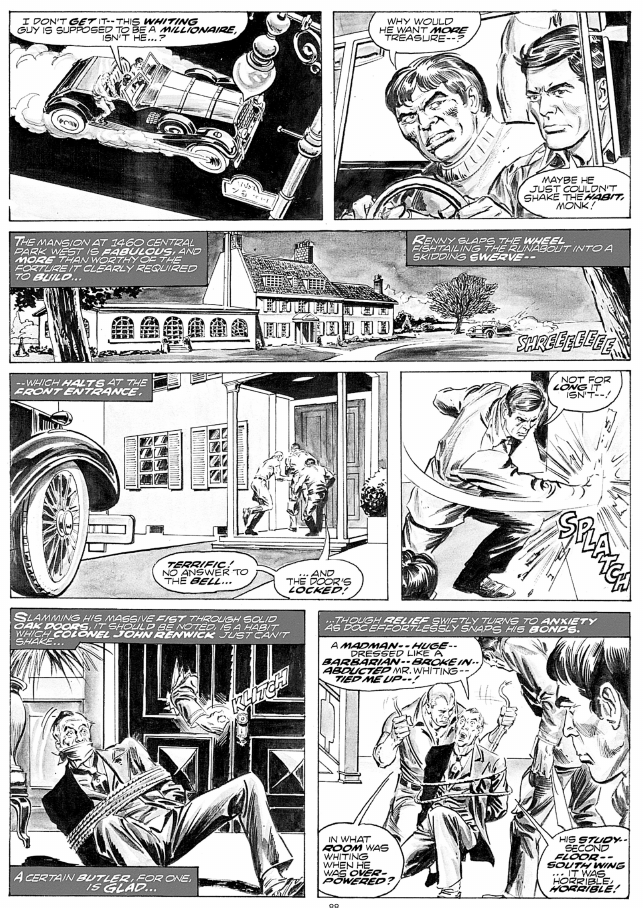
The Marvel black and white magazine line was headlined strongly by the monster craze then going on in the comics world, and the Ken Barr cover of Doc Savage #2 was a little uncomfortably monster-heavy, but the actual story began as a solid pulp yarn, with mysterious kidnappings, a quirky Viking-attired villain, and a tale told of a treasure hunt in the far north that had ended in tragedy. Doc had just made his first appearance in the tale, arriving at his 86th floor headquarters as his aides were listening to the account of the lost expedition given by an apparent blind man named Sandy Taine. Doc quickly unmasks Taine, who is in fact a woman.

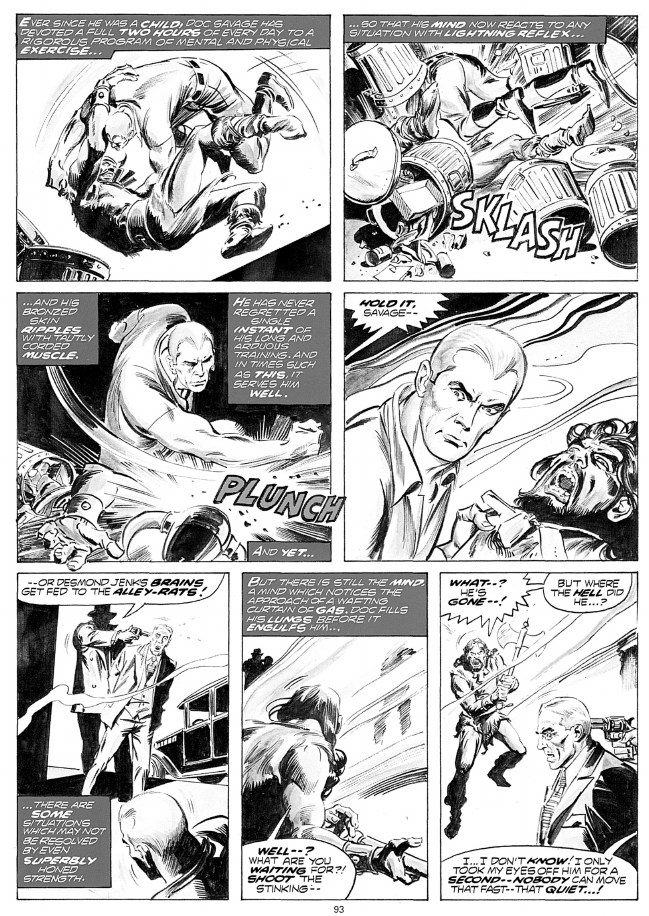
Doc swings into action, and the tale is off and running. Moench and DeZuniga had a great feel for the interplay of Doc and his aides (and even included amusing little moments like the one almost hidden by a word balloon in the second to last panel, where Sandy’s guard dog and Habeus Corpus give one another a curious sniff).
We jump right to a dynamic panel of Doc riding the running board of his distinctive 1930’s vehicle, against a backdrop of Depression-era New York.

An action scene quickly follows, as Doc and the aides arrive in the aftermath of another kidnapping. Using an ultraviolet lantern (one of his favorite devices from the pulps), Doc begins to shed light on the mystery.


Another little visual clue is dropped here, cleverly woven into the fast-paced sequence. Monk surmises that the kidnappers entered through a broken window, but when he sticks his head out and looks up, the viewing angle is instead pointed down, with broken glass on the ground below the window. The window was broken outward, not inward.
The scene shifts to a Manhattan warehouse district, where Doc (using Sandy’s blind man disguise) arrives in time to potentially thwart the last of the kidnappings, touching off a fierce fight with the “Mad Viking”.
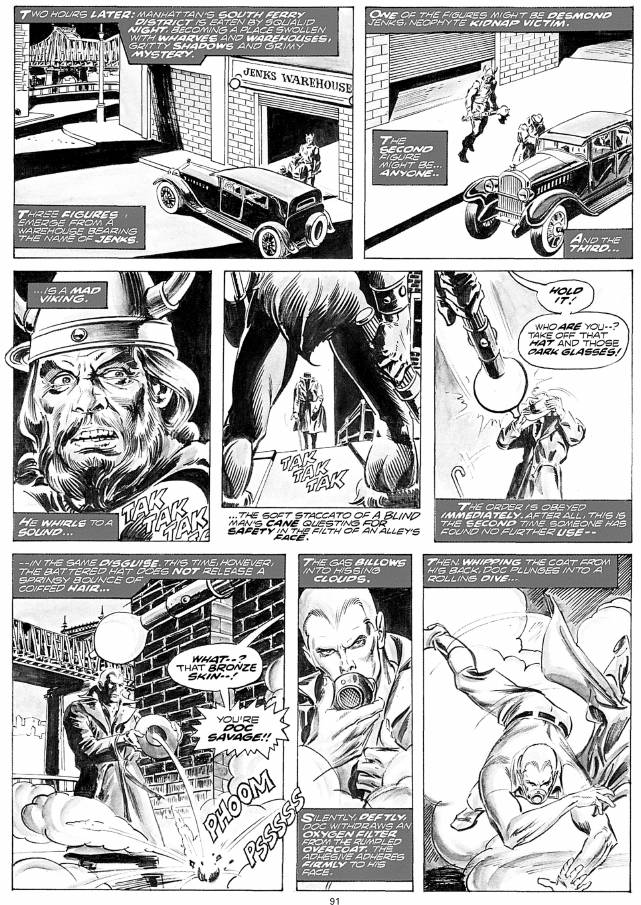

The aftermath of the fight yields another intriguing clue, which prompts one of Doc’s rare small smiles. Then he returns to headquarters to share what he has discovered.

The unveiling of the map to the treasure site is clever (if a little improbable)…story-author Moench delighted in this type of puzzle.


And so they are off to the Hidalgo Trading Company, and will soon be on their way to the heart of the mystery.
to be continued…

Man, I loved the Marvel B&W run of Doc Savage. It really captured what I thought would be the “look and feel” of the pulps. Great story, too. Thanks for bringing some light to these issues. Looking forward to the rest of the commentary!
LikeLike
Thanks Paul! Needless to say, I loved them too. Almost fifty years later, I still read them with absolute delight.
LikeLike